Guide · Fig. 02
How to view stereograms
Seeing a hidden 3D image is a learnable skill, not a talent. This page is pure technique: a short warm-up ladder that trains your eyes stage by stage, plus fixes for the moments it refuses to click.
The idea, briefly
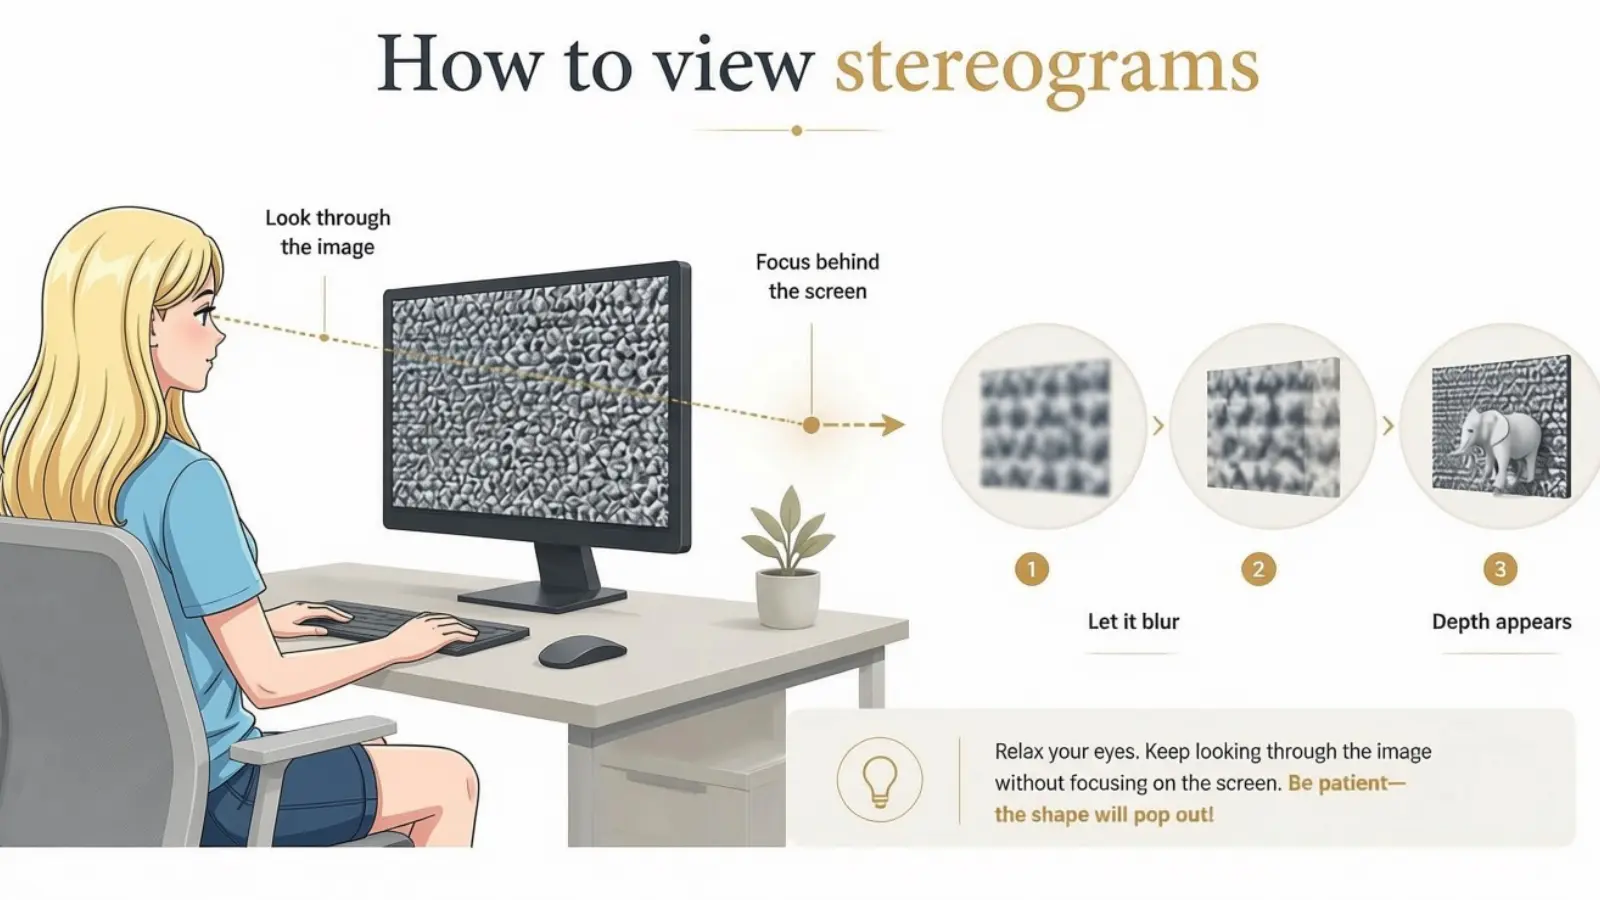
Every image on this site hides its 3D picture inside a repeating pattern. To see it, you keep the picture in front of you while aiming your eyes at a point behind the screen — a relaxed, faraway gaze known as parallel viewing. When two neighbouring repeats of the pattern overlap in your vision, the hidden shape rises out of the texture. That is all the theory this page needs; the full explanation of why it works lives on The Science page.
Before you start
- Rest your eyes first. Look away from the screen for a short moment. A relaxed gaze is much easier to find with rested eyes.
- Sit comfortably at about arm's length, with the image roughly at eye level and as large as fits your screen.
- Keep everything level. The top and bottom edges of the picture must stay parallel to the line between your two eyes. A tilted head — or a rotated image — blocks the effect completely.
- Reduce glare. Strong reflections on the screen compete with the pattern and make fusing harder.
The four-stage warm-up ladder
Rather than staring at a stereogram and hoping, train the eye posture directly. Each stage takes well under a minute, and each one builds on the previous.
Stage 1 — split one finger
Hold one finger upright about 25 cm in front of your face. Now look past it at something far away — the opposite wall, or the floor across the room. Without any effort, the finger appears to split into two. That doubling means your eyes are aimed beyond the finger, which is exactly the posture stereograms need. Switch a few times between looking at the finger (one finger) and past it (two fingers) until the change feels controllable rather than accidental.
Stage 2 — merge two fingers into three
Now hold up two fingertips side by side, about 3 cm apart, and look past them at the far wall again. Each finger doubles, so you briefly see four. Adjust your gaze distance slowly — a little nearer, a little farther — until the middle pair slides together and merges: four becomes three. Hold the three-finger state steady for a few seconds. That solid-looking middle finger is your first fused image.
Stage 3 — fuse two circles on paper
Draw two small circles about 3 cm apart on a piece of paper and hold it at reading distance. Aim your gaze behind the paper exactly as before, until the two circles become three. The middle circle — the fused pair — looks a touch more vivid than its neighbours. Practise holding it steady, then moving the paper slowly nearer and farther without letting the middle circle break apart.
Stage 4 — transfer to a stereogram
Open a piece from the gallery, or generate one. Settle into the same relaxed, behind-the-image aim and let the pattern shimmer, drift, and double — that unstable phase is a normal step, not a failure. After a few seconds, parts of the texture lock together, depth appears first as vague layers, and then the hidden shape solidifies. Once it clicks, you can look around the whole picture freely without losing the effect.
Why the ladder works: stages 1–3 teach your eyes to aim behind a surface using targets that give instant, unmistakable feedback (fingers and circles). By stage 4 the skill already exists — the stereogram is just a bigger target.
If it will not click
- Change distance slowly. Holding the relaxed gaze, ease closer to the screen and then farther away. Somewhere in that range the pattern usually snaps together.
- Make the image smaller. Zoom the page out one step. Smaller repeats need less eye divergence and fuse more easily; zoom back in after your first success.
- Start from a calm area. Fuse the flat border region of the image first, where nothing pops out, then drift your attention toward the centre where the subject lives.
- Work in short rounds. Two minutes on, half a minute rest. Most people succeed within a few rounds — and after the first success, it usually takes only a second or two forever after.
Common mistakes
- Crossing your eyes. Cross-eyed viewing fuses the wrong pairs and turns the depth inside-out: the hidden shape appears as a sunken hole instead of popping out. If your 3D looks "carved in," relax your gaze outward instead of inward.
- Chasing sharp focus. Snapping back to a crisp view the instant things blur resets the whole process. Blurriness is a stage on the way, not a problem to fix.
- Tilting your head or the image. The hidden depth is aligned strictly left-to-right. Keep your eyes level with the picture — this single habit fixes a surprising share of failed attempts.
- Quitting at thirty seconds. A first fusion can genuinely take a few minutes across a couple of tries. The skill sticks like riding a bicycle once learned.
Viewing comfort and individual differences
Stereopsis — depth perception built from the two eyes' slightly different views — naturally varies from person to person. Some viewers lock on within seconds, others need several short sessions spread over a few days, and a small number perceive little or no depth this way. Conditions that affect how the two eyes work together, such as strabismus or amblyopia, can make fusion harder, and the effect cannot be seen with one eye alone. None of this locks anyone out of the site: every gallery exhibit has a "Reveal answer" option and the generator includes a depth-map spoiler. Mild, brief eye tiredness while practising is common and typically passes with rest; if you notice persistent discomfort, headaches, or lingering double vision, stop and speak with an eye-care professional.
Ready to try?
Head to the generator, keep the depth setting around 18–26, choose a fine-grained pattern like Static or Confetti, and start with a single short word or a preset shape. Or warm up on the tuned pieces in the gallery first.
Viewing guidance is based on established parallel-viewing techniques used for single-image stereograms. Individual viewing ability varies. Stop and rest if you experience discomfort.